Welcome to Pressria - WordPress Plugin Documentation.
- Item Name : Pressria - Custom Printing Plugin
- Created: 10 Jan 2024
- Version : v 1.0.0
- Author : Pressria
- Plugin Documentation : https://www.pressria.com/pressria/document
First of all, thank you so much for being a customer of this plugin. You're awesome! You get free updates to this product and great support from the author himself.
This documentation will help you with each step of your customization. Please read through it carefully to understand how this plugin was created and how to edit it properly.
Plugin Requirements
To use Pressria, make sure your hosting provider is running the following software:
- WordPress 4.8 or higher.
- PHP 5.6 or greater. WordPress officially suggests to use PHP 8.2.
- MySQL 5.6 or greater.
Recommended PHP Limits
To use Pressria, make sure your hosting provider is running the following software:
max_execution_time 180memory_limit 128Mpost_max_size 64Mupload_max_filesize 64Mmax_input_time = 60max_input_vars = 3000
Also consider upgrading your PHP version to the latest version, the newer the better.
WordPress Information
To install this plugin you must have a working version of WordPress already installed. If you need help installing WordPress, follow the instructions in WordPress Codex or you can watch the. Below are ll the useful links for WordPress information.
- WordPress Codex – general info about WordPress and how to install on your server
- First Steps With WordPress – general information that covers a wide variety of topics
- FAQ New To WordPress – the most popular FAQ’s regarding WordPress
Pressria Plugin Download
Wordpress Pressria Plugin Installation
Wordpress Pressria Plugin Installation
- Download the pressria.zip file.
- **All files & documentation **(full zip folder). You will need to extract and locate the installable WordPress file to upload when installing plugin
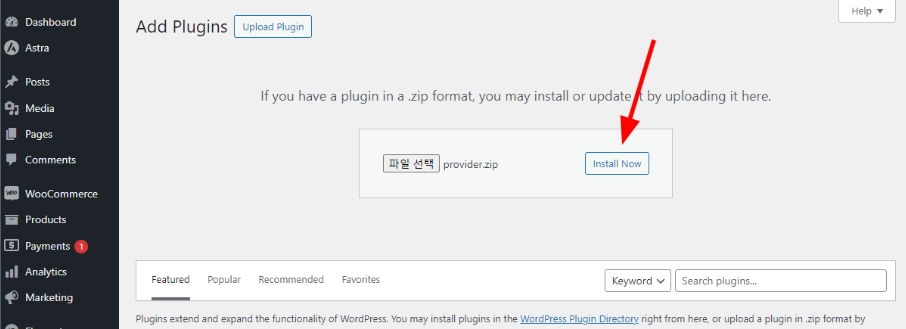
- Log in to your WordPress Dashboard (Ex: http://yourwebsite.com/wp-admin).
- Navigate to Plugins > Add New > Upload Plugin.
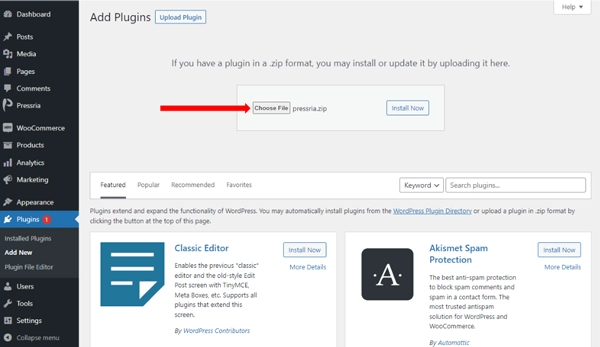
- Navigate to the pressria.zip file on your computer, then click Install
Now
- When the installation is complete, click Activate Plugin. You're redirected to the plugin page.
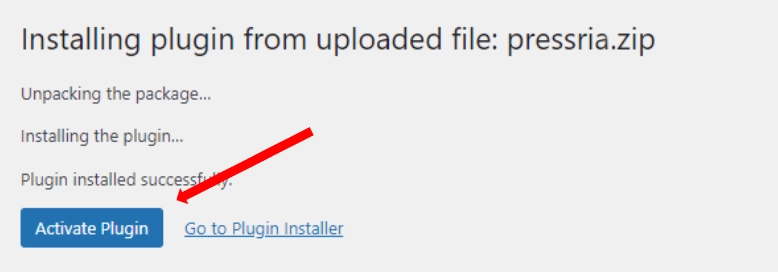
- Done.
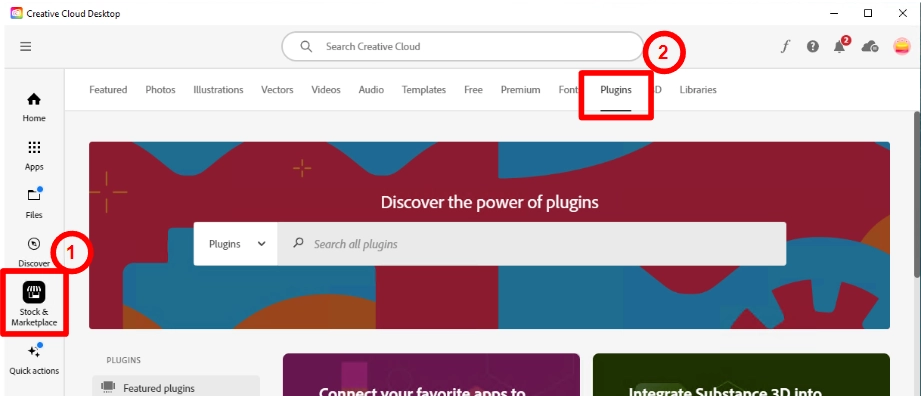
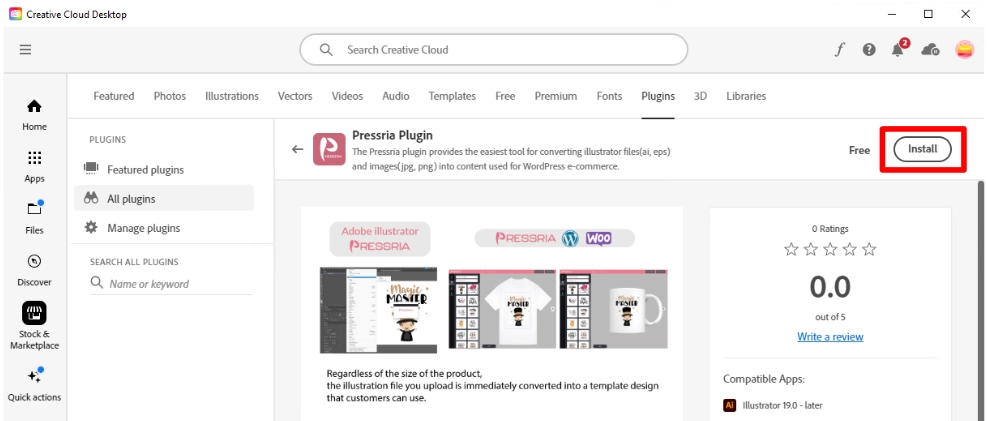
Adobe Illustrator Pressria Plugin Installation
Adobe Illustrator pressria pluginLaunch Adobe Creative Cloud
-
Click to Stock & Marketplace > Plugins
-
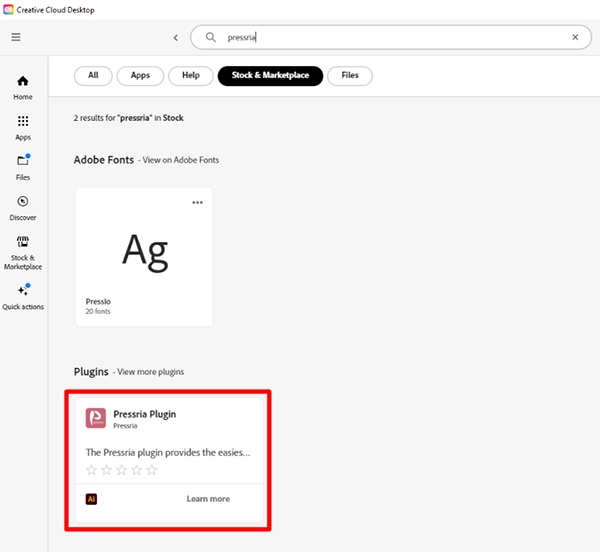
Search to Pressria

-
Click Pressria Plugin.
-
Click Install
-
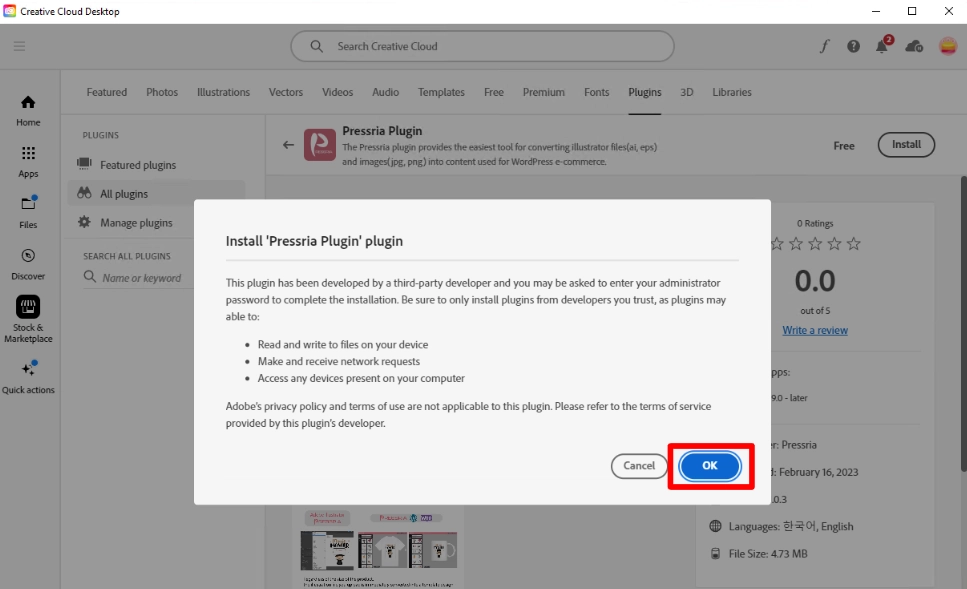
Click OK
-
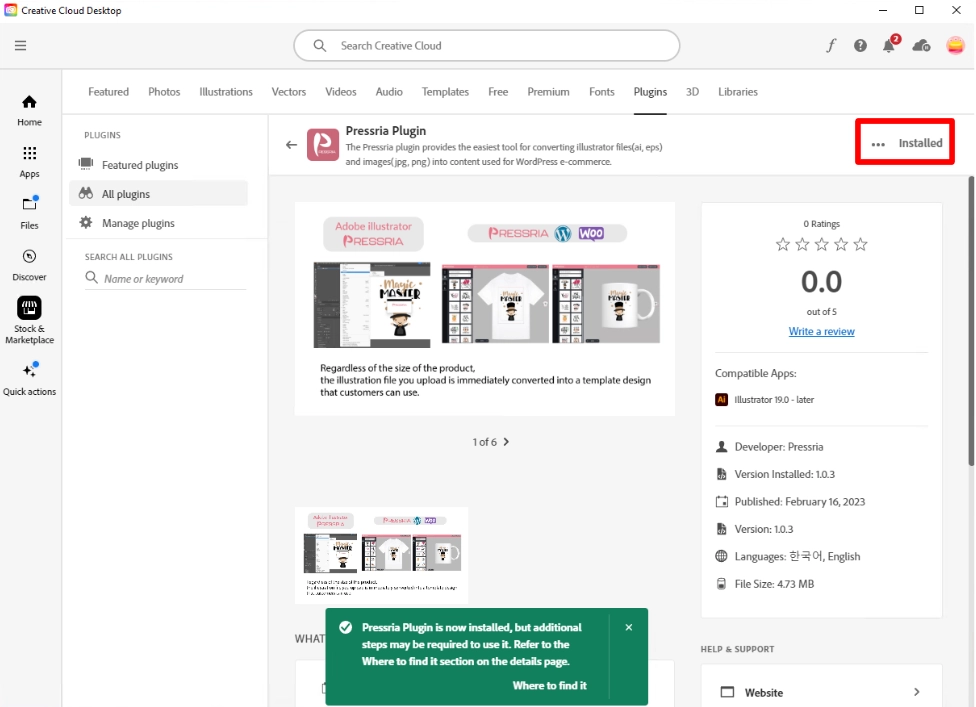
Done
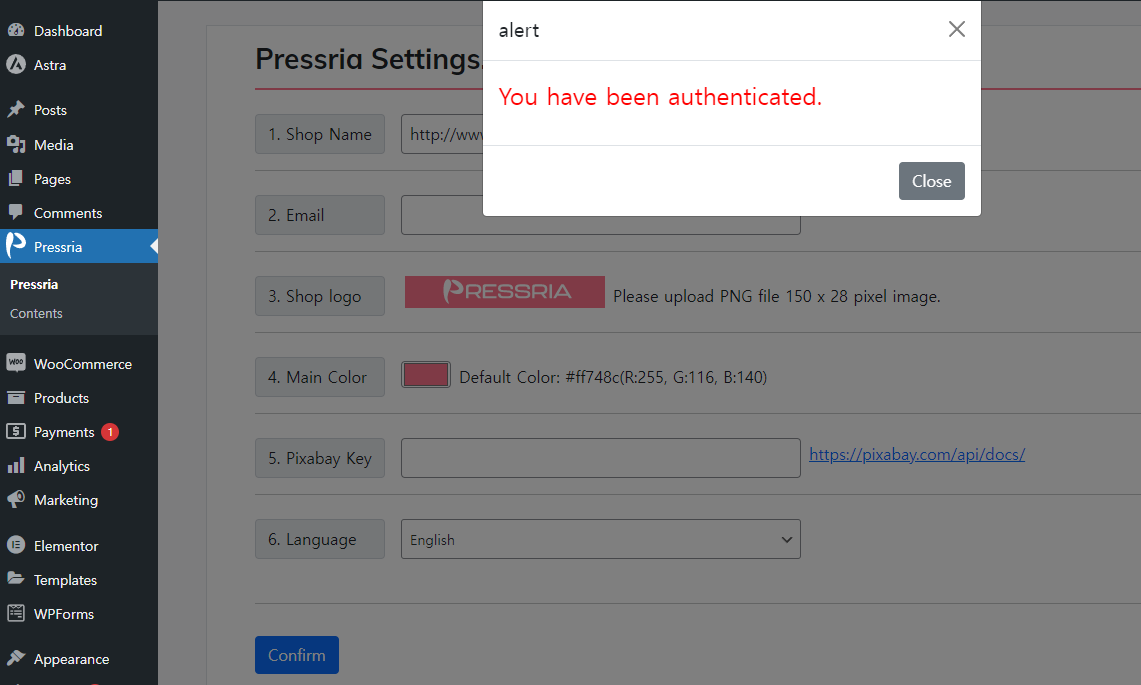
Pressria default settings
When you activate Pressria, you will see Pressria in this menu.
Enter your shop name
-
Shop Name : Enter your shop name

-
Email : Enter manager email

-
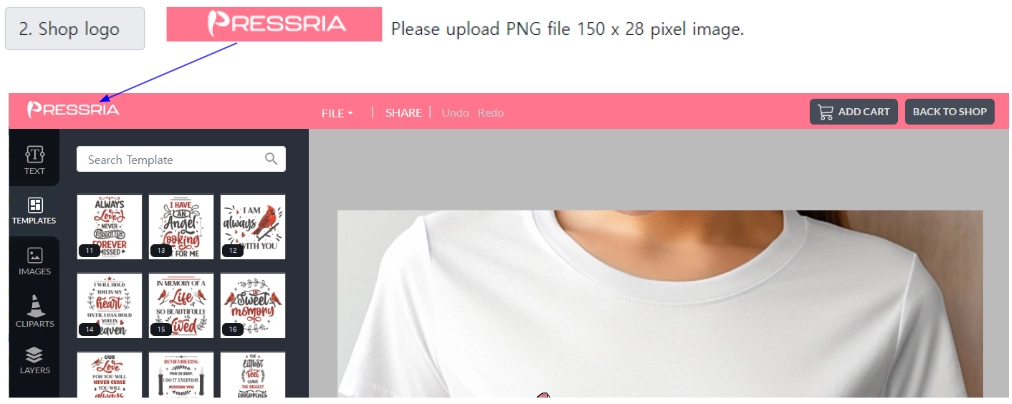
Shop Logo : Register your shop's logo
-
Main Color : Specify the color of the top menu in the editing tool.

-
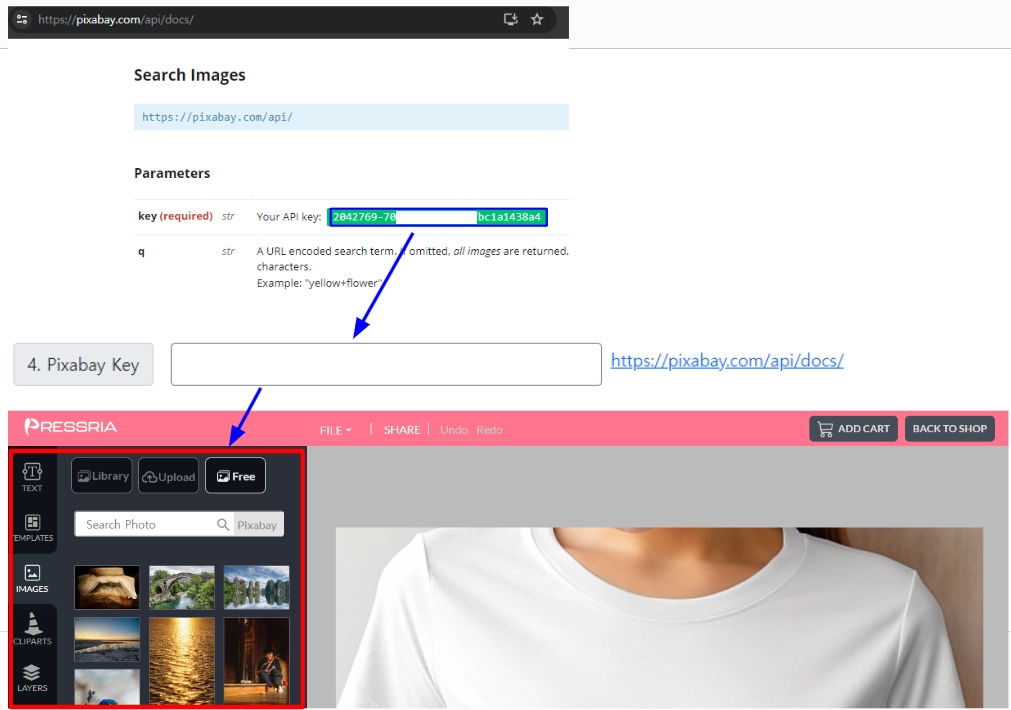
Pixabay Key : Enter your Pixabay key to make all the photos provided by Pixabay available to your customers. After registering as a Pixaby member, visit https://pixabay.com/api/docs/ and enter your API key as shown below.This is provided by Pixabay for free.
-
Language : Select a language

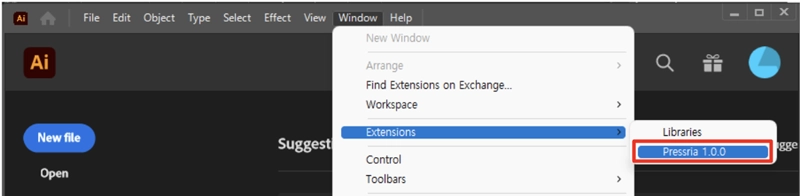
Connecting the Adobe Illustrator Pressria plugin with the WordPress Pressria plugin.
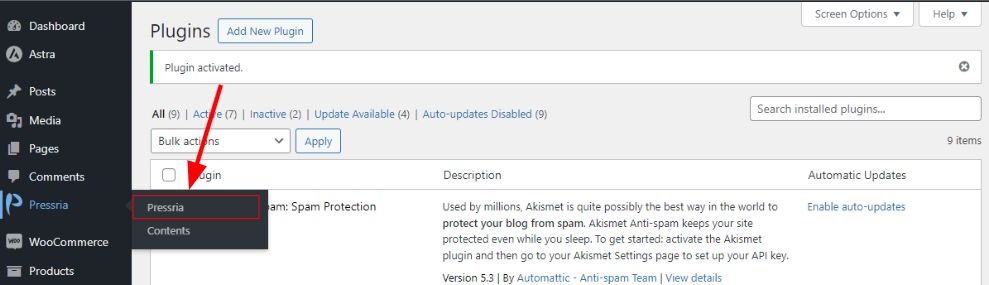
Navigate to Window > Extensions > Pressria 1.x.x
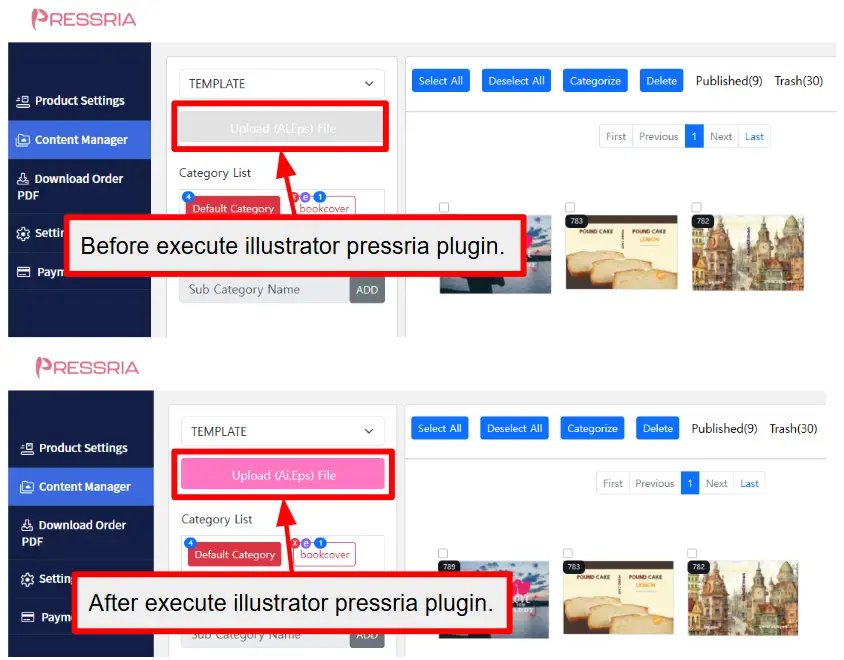
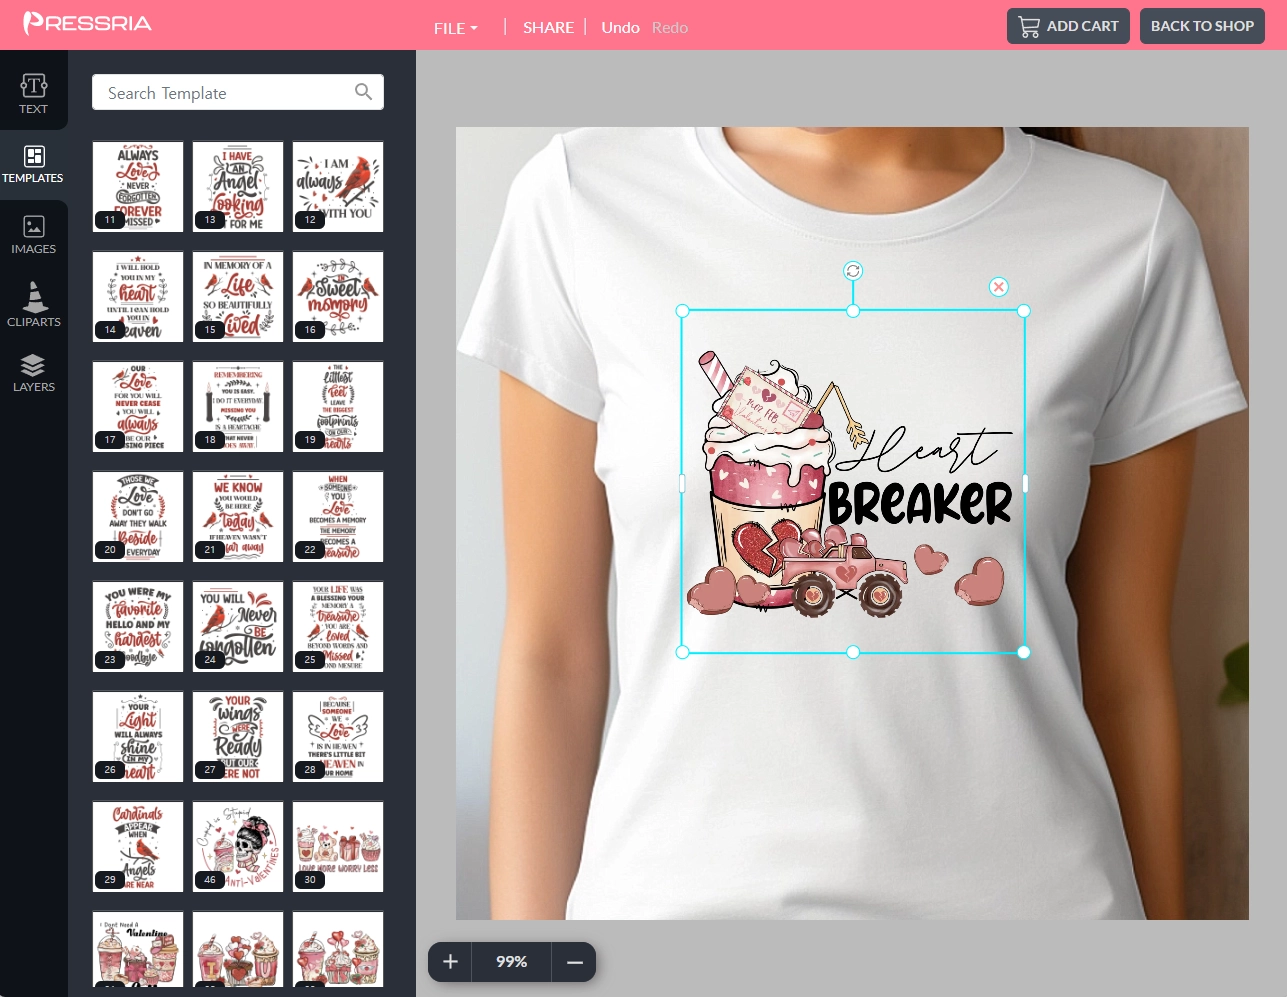
Pressria Contents
Pressria Contents serves to categorize and manage incoming content from the Pressria Illustrator plugin. It converts vector, image (JPG, PNG) and text from Illustrator files (Ai, eps) into content that customers can edit in a web browser.
** Doesn't work with Safari browser on Mac. Please use Chrome on your Mac.
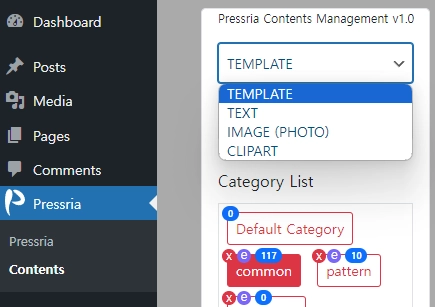
Pressria Content offers four types of content.
-
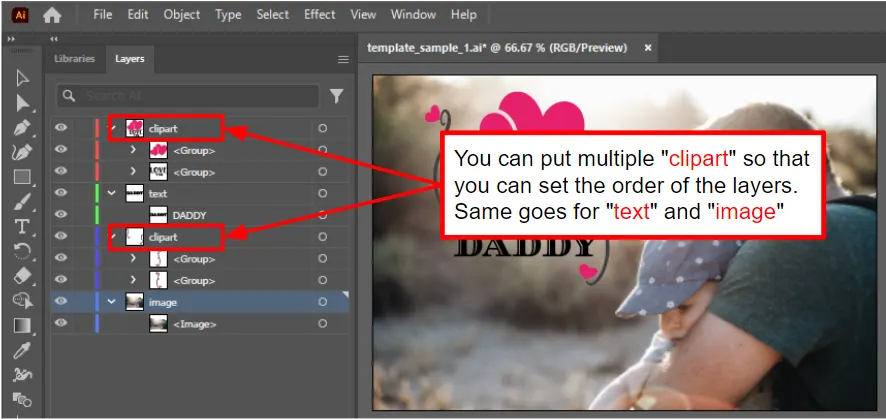
Template : This is a content that contains text, image, vector(clipart) in one illustrator file.

-
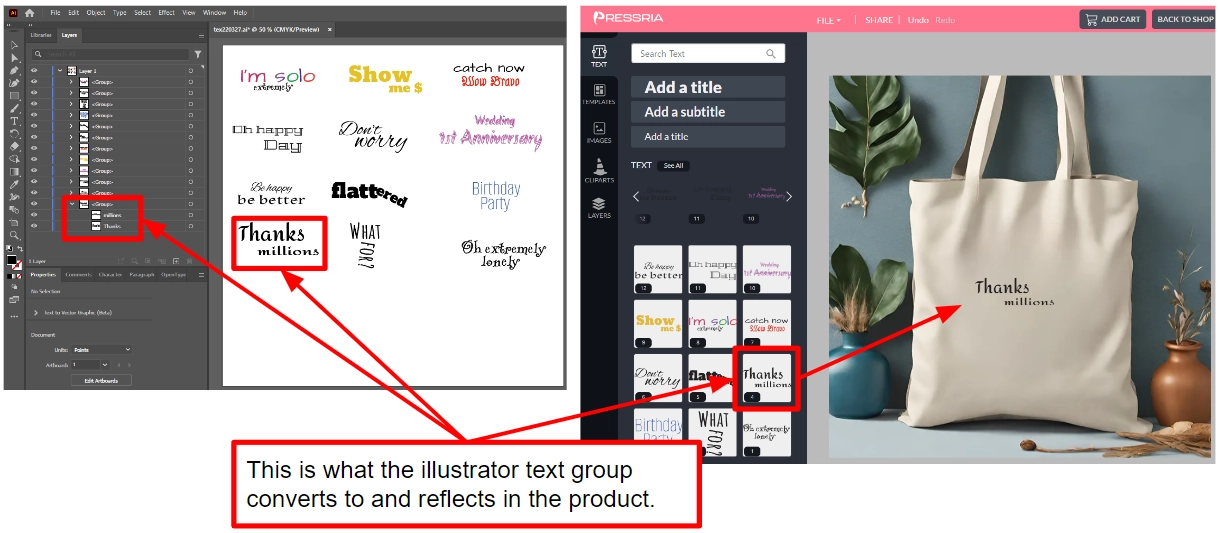
Text : Converts the 'groups' in the first layer of the Illustrator file. Only TEXT should be inside this 'group'.
-
Image : Click the "Upload (jpg,png) File" button to select the image you want to convert. You can upload just one image here,
or press Crtl + A to select all images in the folder and all images will be converted automatically. -
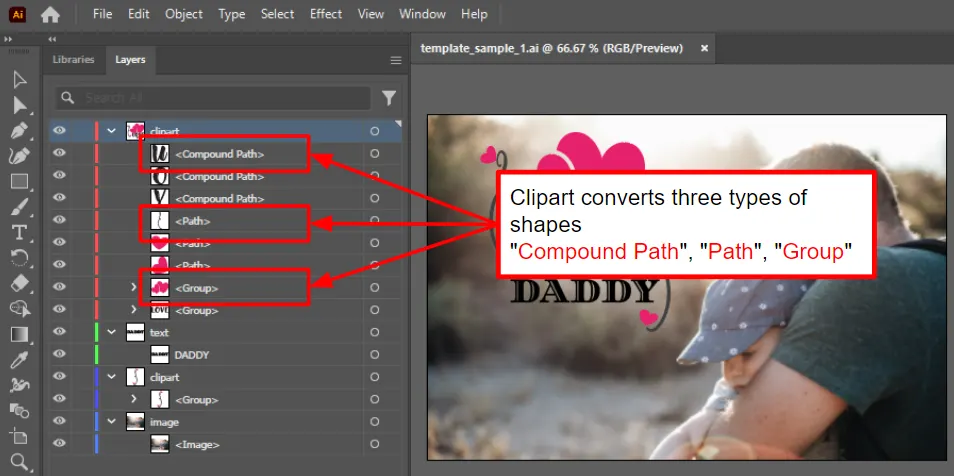
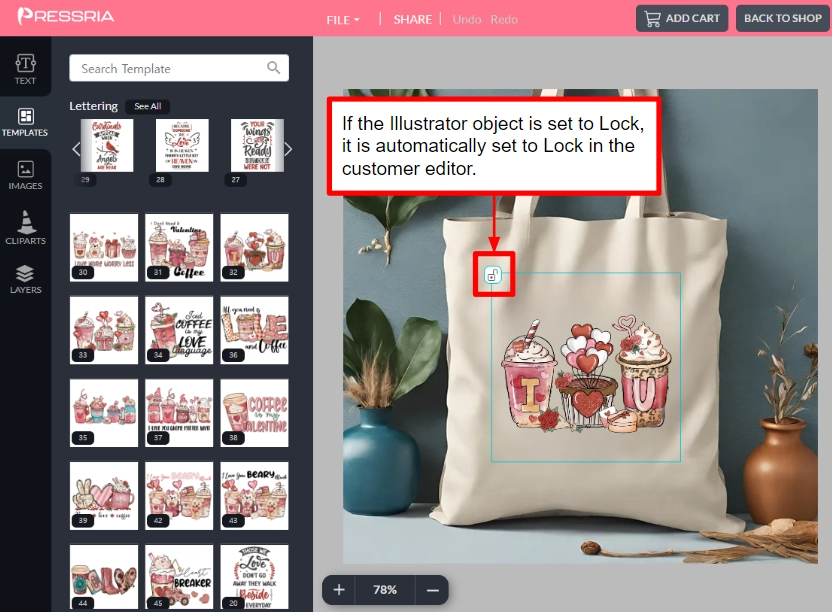
Clipart : Convert "Group", "Compound Path", and "Path" to Vector inside the first layer in the illustrator file.
If there is any Text in this group, it will be automatically "OutLines"
Pressria Contents Management
Pressria contents management functions to manage content that has been converted to Illustrator.
It sets categories, subcategories, and provides functions to move and delete categories.

-
Select All content on the current page.
-
Deselect All selected content on the current page.
-
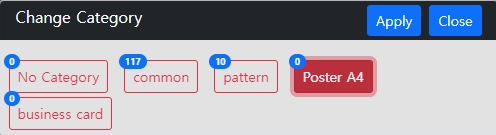
Categorize selected content on the current page.
If the selected category has subcategories, the subcategories will appear below and you can select them.
-
Delete Move the selected categories to the trash.
There is a recycle bin for each content type, and clicking the "Restore" button in the recycle bin will restore the selected content again.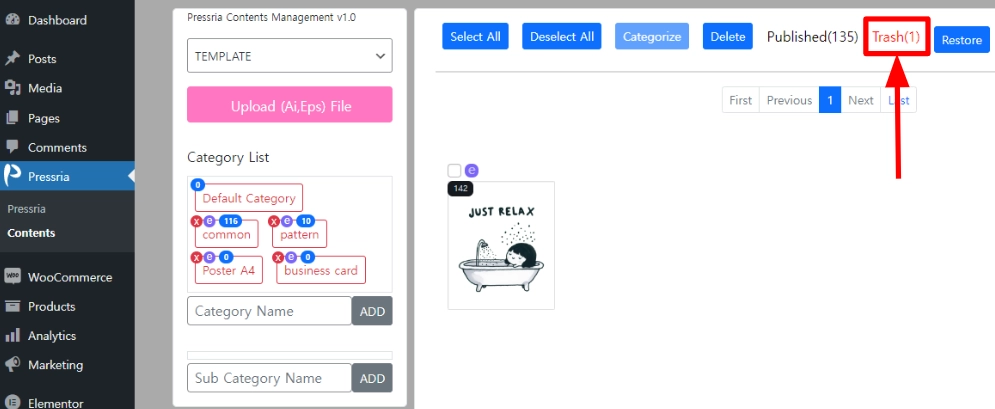
-
Published represents the number of published content by content type.
-
Trash represents the number of contents in the trash by content type.
-
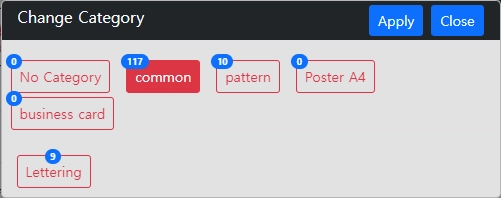
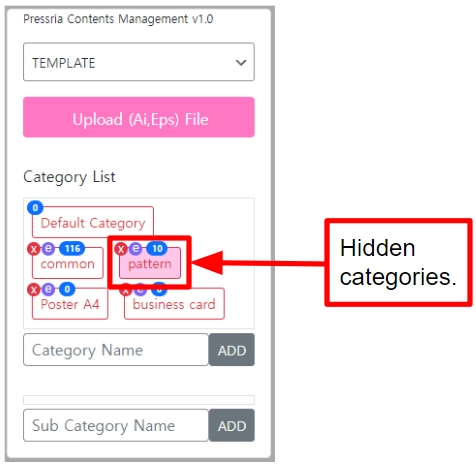
Category Rename & Hidden.
You can rename and hide categories.
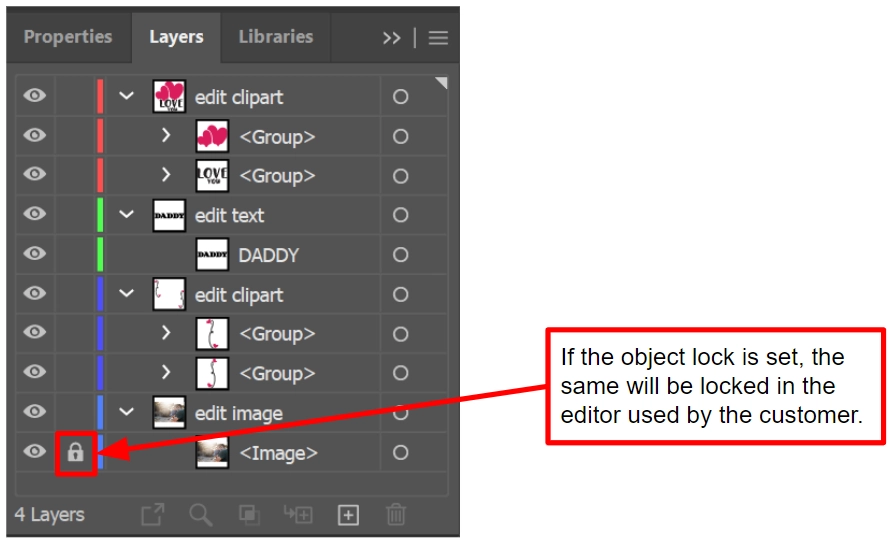
When you hide a category, all content within it will not appear in the customer's editor.The hidden categories are displayed as shown below.
-
Check contents. Modify the position of a converted template in Illustrator.
We can't guarantee that a template converted from Illustrator will convert perfectly,
so we make it possible to change the position of the content in the template in the same editor environment used by the customer.
You can also check the size of the content as it appears on the actual product.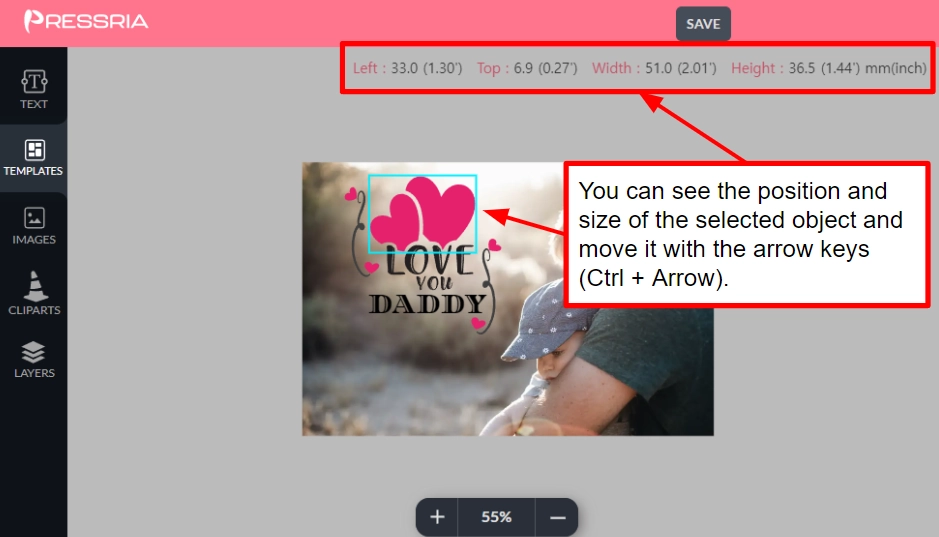
Connecting Pressria with shopping cart products.
Navigate to Products > All Products
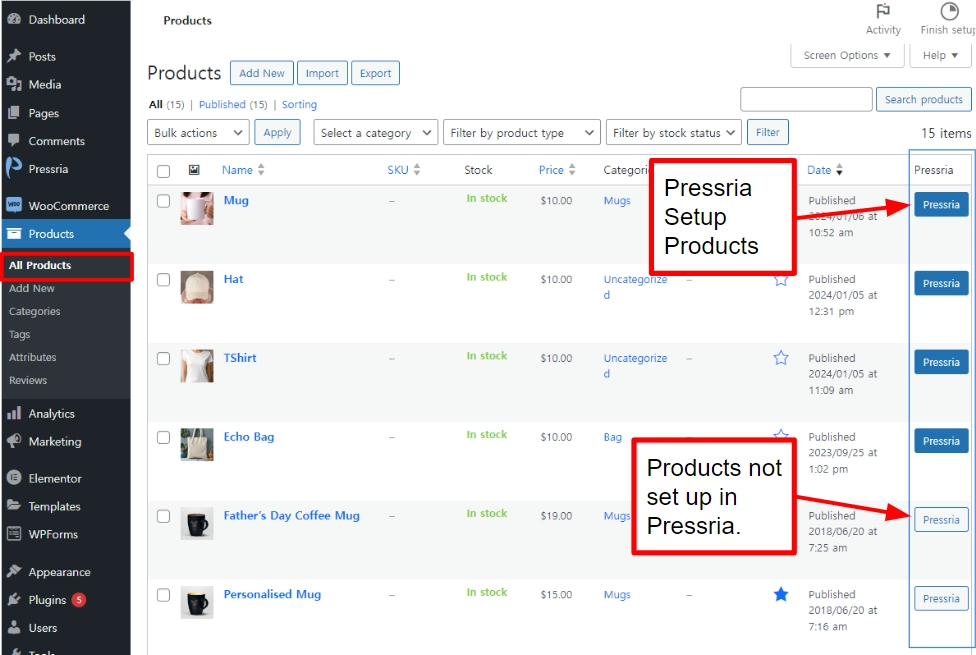
Setting Product in PRESSRIA.
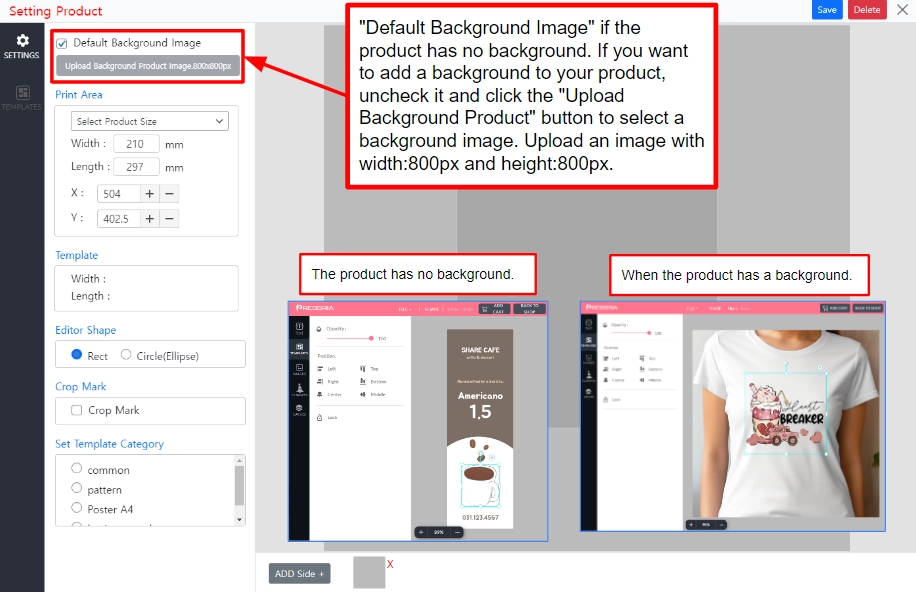
Setting a background image for a product
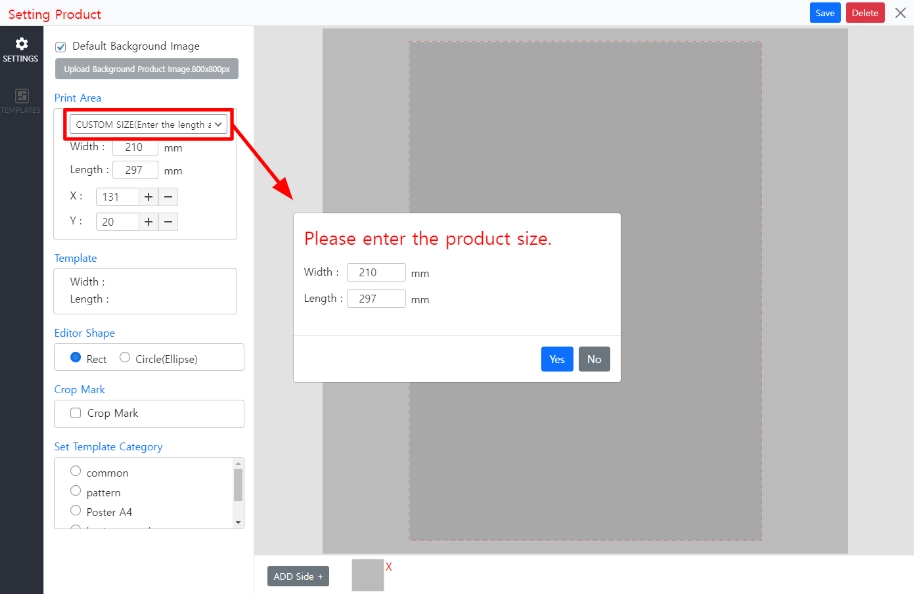
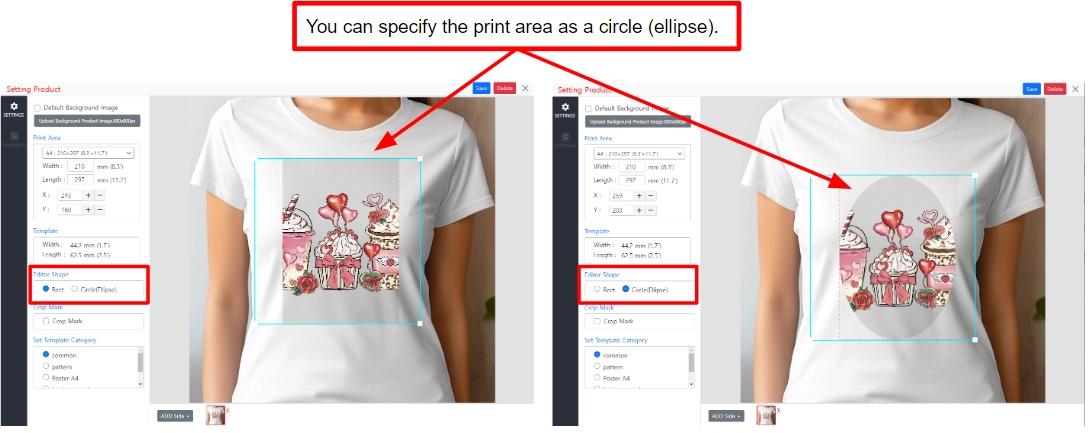
Setting the print area
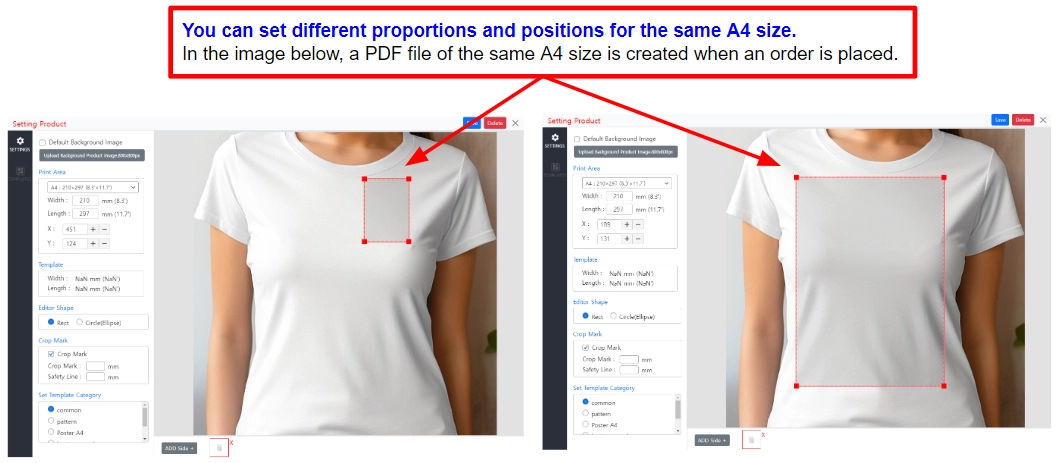
Set the actual size of the print area.
When you set the print area, you'll see a red square box.
This box marks the print area.
If you set an A0 size print area and an A4 size print area, the size that appears on the screen is the same.
However, the size of the screen is the same, but the actual print area is A0 and A4.
Only the size on the screen is the same, but the ratio is different.
For example, when you zoom in and out of the map, the screen size is the same, but the map content is different.
When printed out as a PDF file, it will be A0 and A4 in size.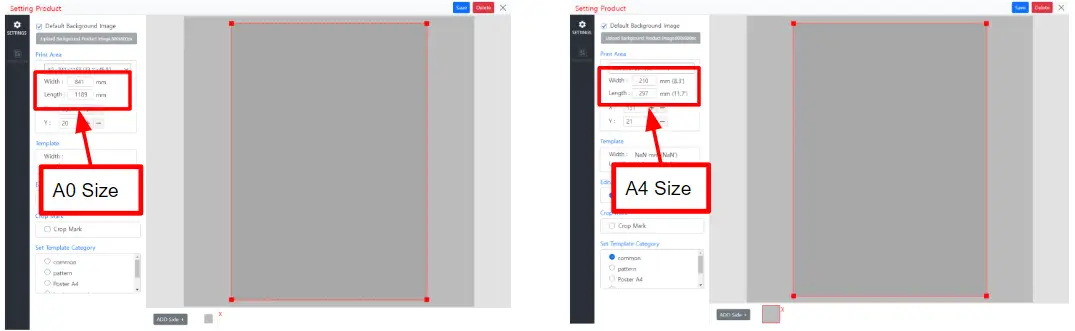
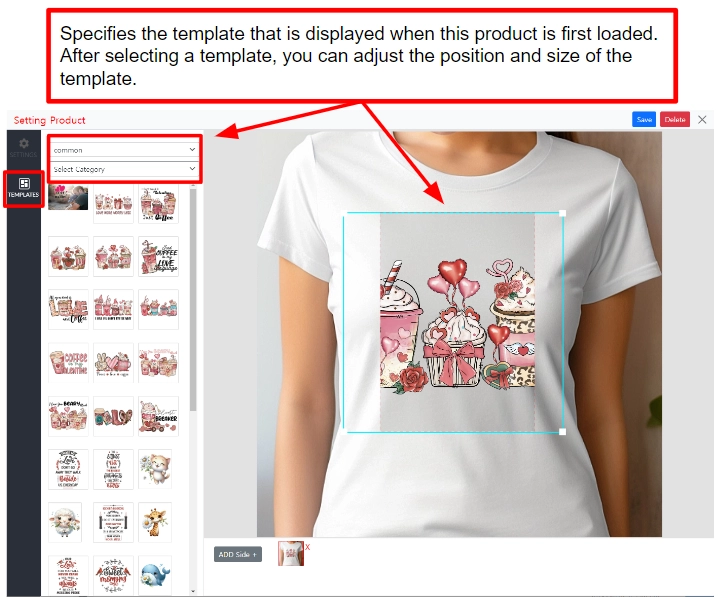
- Linking products and templates
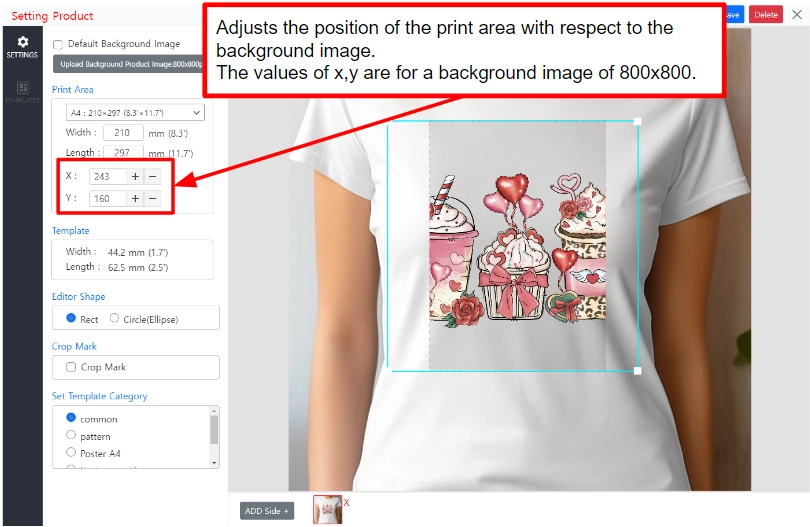
- Print Area Position Adjustment
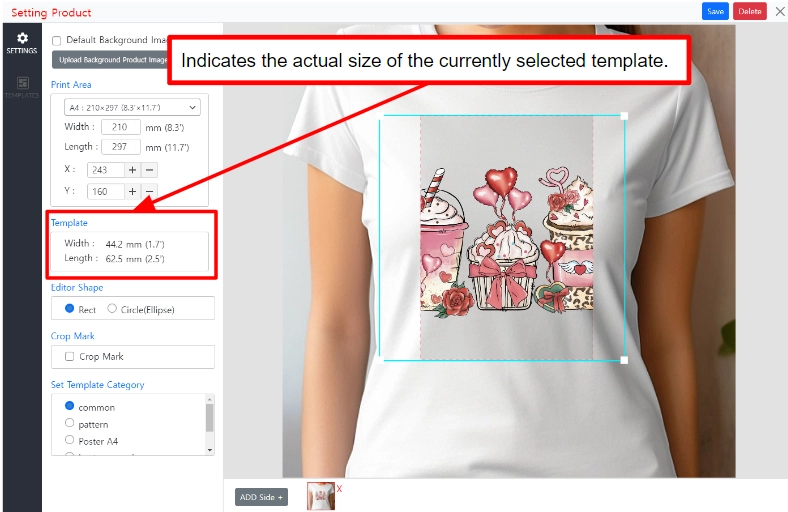
- Adjust template position
- Editor Shape
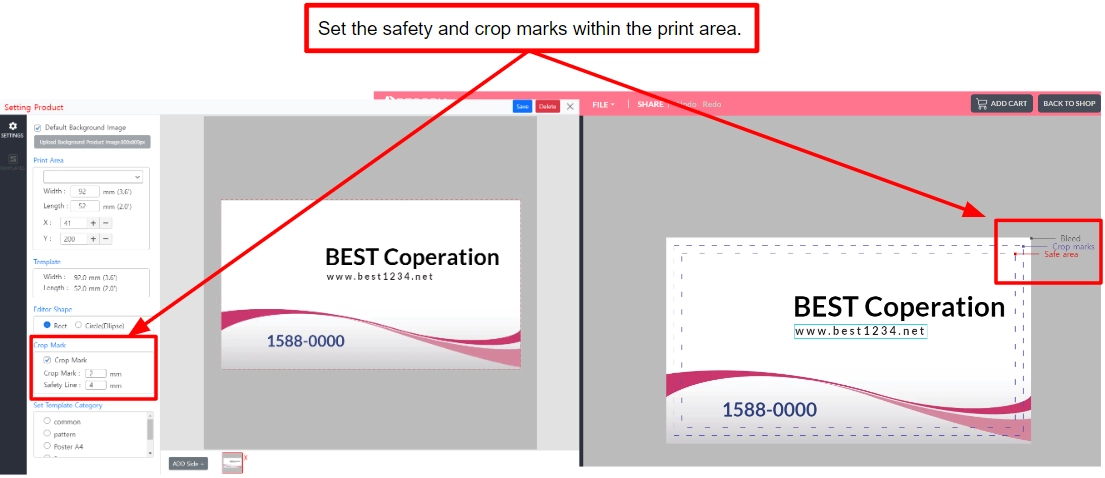
- Crop Marks
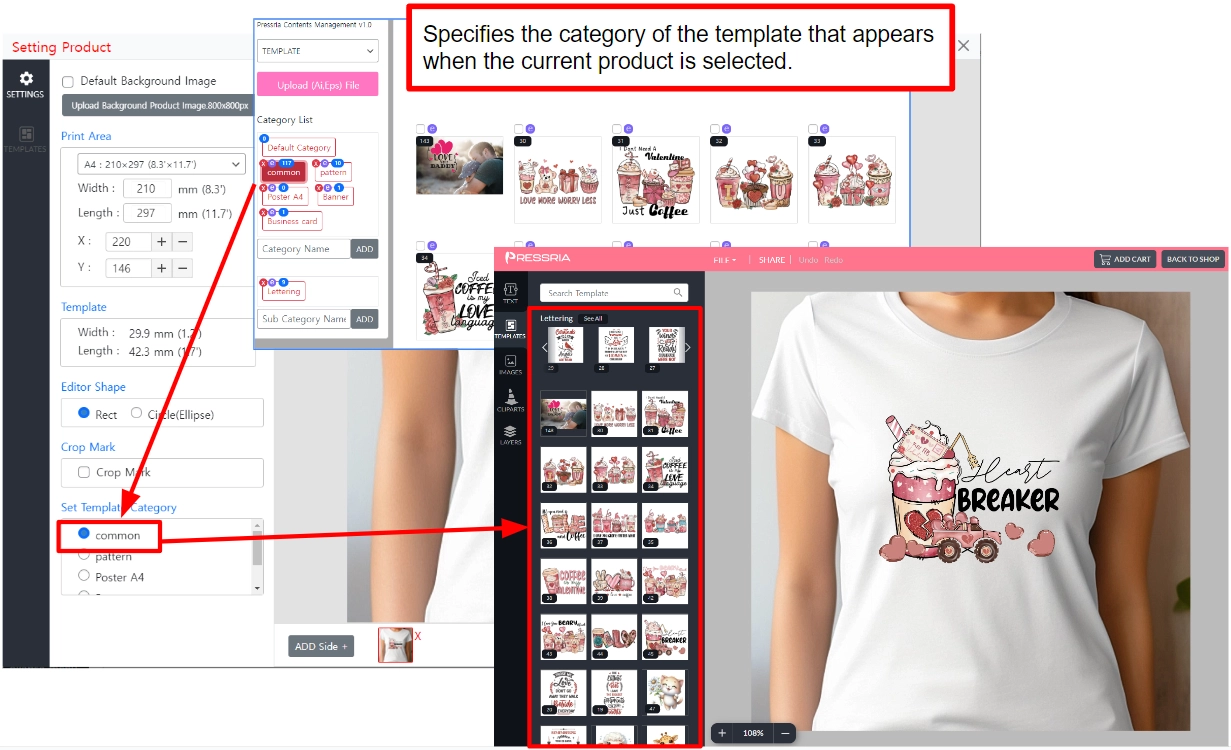
- Set Template Category
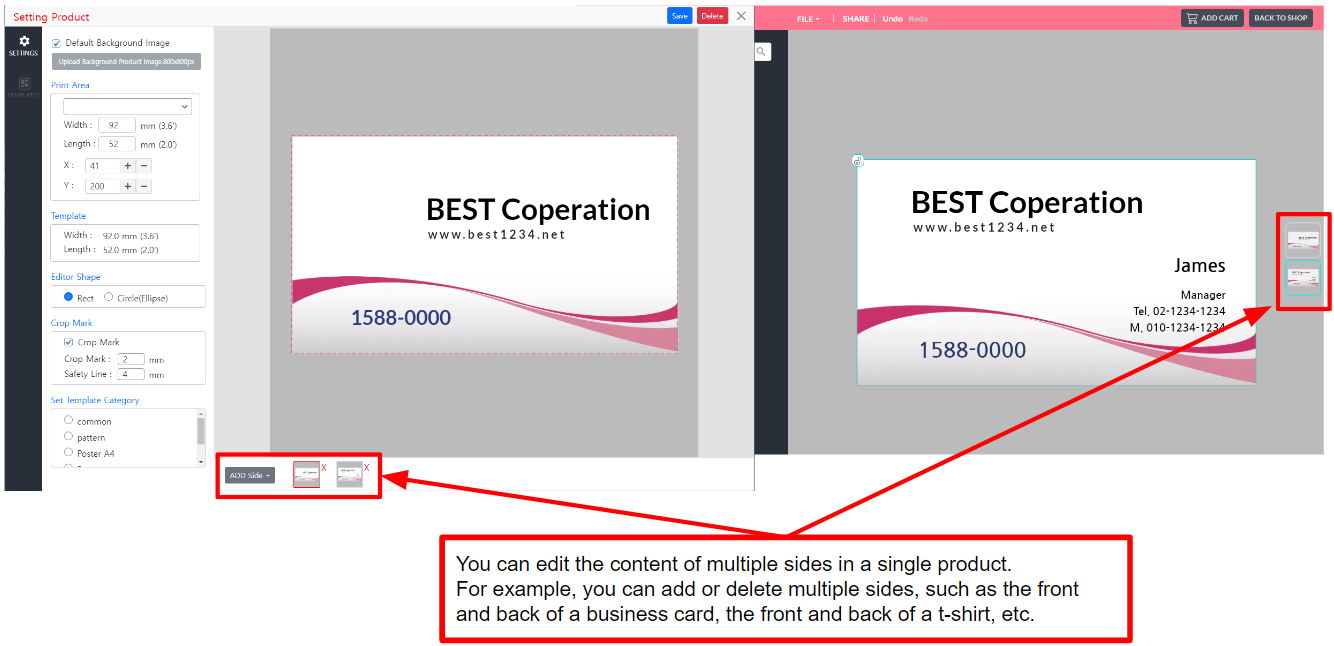
- Add Side

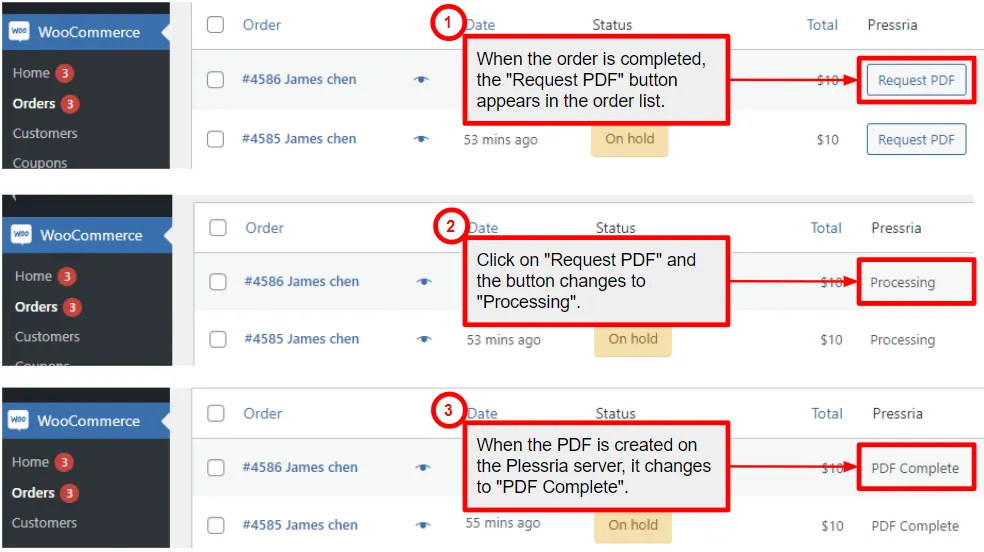
How to download a PDF file for a customer's order.